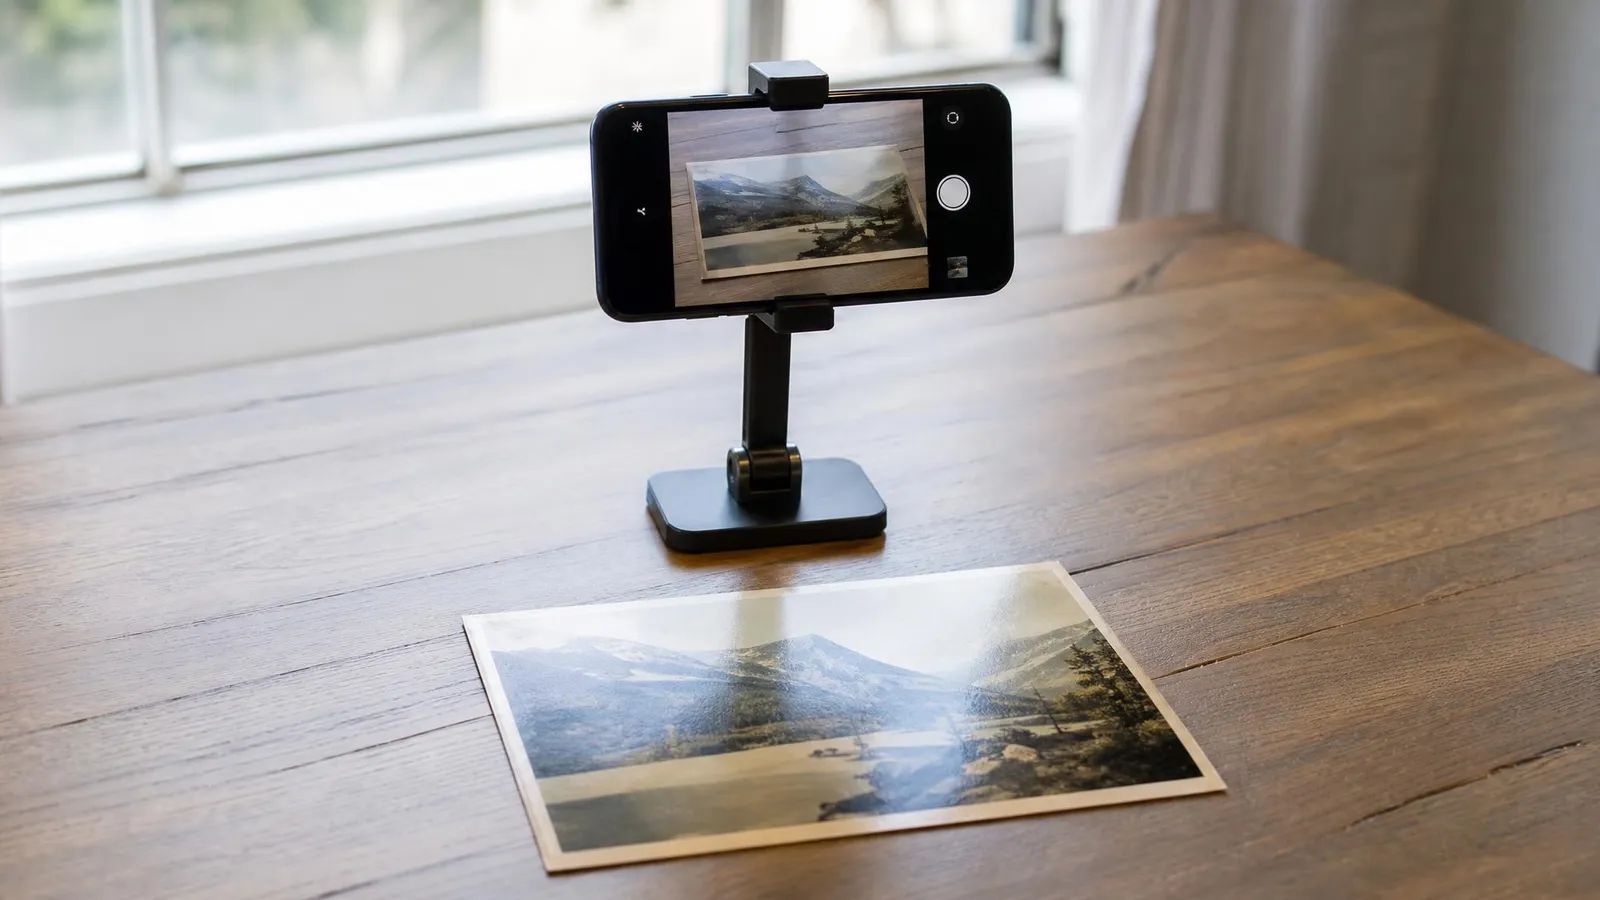
Restoration works on what you give it. Scratches, tears, stains and fading are all damage on the print, and a repair pass handles them well. Blur, glare and a squashed perspective are damage in your copy - added at the moment you pressed the shutter, sitting on top of the original problem, and much harder to undo.
The good news is that the copy is the easy half. You don’t need a scanner. A phone from the last five years out-resolves a consumer flatbed for a 10×15 cm print, and the difference between a bad phone copy and a good one is about sixty seconds of setup.
Five things go wrong. They’re always the same five.
1. Glare - the one that actually matters
A glossy print is a mirror with a picture on it. Point a phone at it under a ceiling light and you get a white blob across someone’s face, and that blob is not recoverable: where the highlight clipped, there is no image data underneath. Restoration can rebuild a torn corner from context. It cannot rebuild a face it has never seen.
Fix: put the print flat on a table near a window, with the window to one side. Never overhead, never behind you. Then, before shooting, move your head around and watch the print - you’ll see the bright patch slide across it. Find the position where it slides off the edge entirely, and shoot from there.
And turn the flash off. On-camera flash fires straight down the lens axis, which is the exact geometry that guarantees a reflection straight back. There is no print, and no angle, where phone flash helps here.
2. Your own shadow
Once people hear “shoot straight down”, they stand over the photo - which puts their torso between the light and the print. The result is a copy that’s darker at the top, or has a soft grey band across the middle that looks like fading but isn’t.
Fix: light from one side, you on the other. Stand perpendicular to the window, hold the phone out over the print rather than leaning your body across it. If the room is tight, shoot near an open door instead - same principle, more space to stand out of the way.
3. The print isn’t flat, and neither is the phone
Old prints curl. Photograph a curled print and one half is out of focus while the other is lit differently. Separately, if the phone isn’t parallel to the print, you get keystoning - the far edge narrower than the near one - so the photo becomes a subtle trapezoid, and every face in it is subtly stretched.
Fix for the print: let it flatten under weight for a few hours (a book on top, with clean paper between), and weigh the corners down with something that sits outside the frame - coins, keys, anything. Don’t force a brittle print flat and don’t press it under glass: glass adds a second reflective surface and cracks emulsion that’s already fragile.
Fix for the phone: turn on the camera grid, and on iPhone the level indicator (Settings → Camera → Composition). Line the print’s edges up with the grid lines. If the edges look parallel to the grid, your sensor is parallel to the print.
4. The print is a small island in a big frame
This is the quiet one. People stand back, shoot the print with 40% of the frame taken up by table, then crop. Cropping is throwing pixels away: a 12-megapixel capture that’s two-thirds table delivers about four megapixels of actual photograph.
Fix: fill the frame with the print, edges just inside. If you can’t get close enough without your phone’s shadow falling in, back off and use the 2× optical lens rather than pinch-zooming - pinch-zoom is a crop performed for you, with the same loss.
Tap to focus on a face, not on the border. Phones meter for the brightest thing in frame, and a white border will make them underexpose everything you care about.
5. Glass and plastic between you and the picture
A framed photo behind glass reflects the entire room, twice. Album pages with those cloudy self-adhesive plastic sheets scatter the light and knock the contrast flat.
Fix: take it out. If the print is stuck to old album adhesive and doesn’t lift with gentle pressure, stop - leave it in place and shoot it there rather than tearing the emulsion. A slightly hazy copy of an intact print beats a perfect copy of one you damaged getting it out.
What not to do to the print itself
Worth saying plainly, because the internet suggests all of these:
- Don’t clean it. No water, no alcohol, no cloth. Photographic emulsion lifts, and surface dirt is trivially removed digitally.
- Don’t tape a tear. Adhesive is the one damage type that keeps working after you apply it. A tear photographs fine and repairs fine.
- Don’t trim the edges. Frayed borders are cropped in seconds; a cut is permanent.
Every one of those is easier to fix in the copy than on the original.
The sixty-second checklist
- Print flat, corners weighed down outside the frame
- Window light from the side, all other lamps off, flash off
- Move until the glare patch slides off the print
- Phone parallel - grid on, edges lined up
- Print fills the frame, 2× lens if you need distance
- Tap a face to focus, check the shot at full zoom before moving on
Then upload it. Damage on the print - restoration repairs it; if you want the scene in colour as well, colorization does both in one pass. What neither can do is recover a face that your copy turned into a white highlight, which is why the sixty seconds are worth it.